
Pneumatic Fastening Solutions for Automotive Seat Upholstery and Interior Trim

Automotive seats must combine comfort, appearance, durability, and repeatable manufacturing quality. Beneath the finished leather, vinyl, fabric, or foam-backed surface, fastening points play an important role in how the seat cover fits, how the material holds tension, and how the final interior looks after long-term use.
For automotive upholstery shops, seat repair teams, trim manufacturers, and seat assembly workflows, pneumatic fastening tools can improve speed, consistency, and control. The key is selecting the right tool, fastener, pressure setting, and attachment method for each seat material and fastening position.
1. Why Fastening Matters in Automotive Seat Upholstery
Automotive seat fastening is different from general woodworking or furniture fastening. The goal is not only to drive a fastener into a substrate. The goal is to secure upholstery, backing material, foam-supported fabric, side panels, seat cover edges, and hidden trim areas without damaging the visible surface.
A good fastening process helps maintain:
Clean seat cover tension
Stable upholstery edges
Smooth leather, vinyl, or fabric surfaces
Secure backing and trim attachment
Consistent repair or production quality
Reduced rework in repetitive seat assembly
In automotive seat applications, pneumatic staplers and related fastening tools are often more relevant than traditional brad nailers or finish nailers. The fastening point is usually hidden, but the result is visible in the final seat shape, comfort, and finish quality.
2. Common Applications for Pneumatic Fastening Tools
Pneumatic fastening tools can support several automotive seat and interior trim workflows, including:
Seat upholstery edge fastening
Foam-backed fabric attachment
Leather and vinyl wrapping
Seat back panel attachment
Side trim and lower trim fastening
Repair and refurbishment work
Custom car interior upholstery
Small-batch and production-line seat assembly
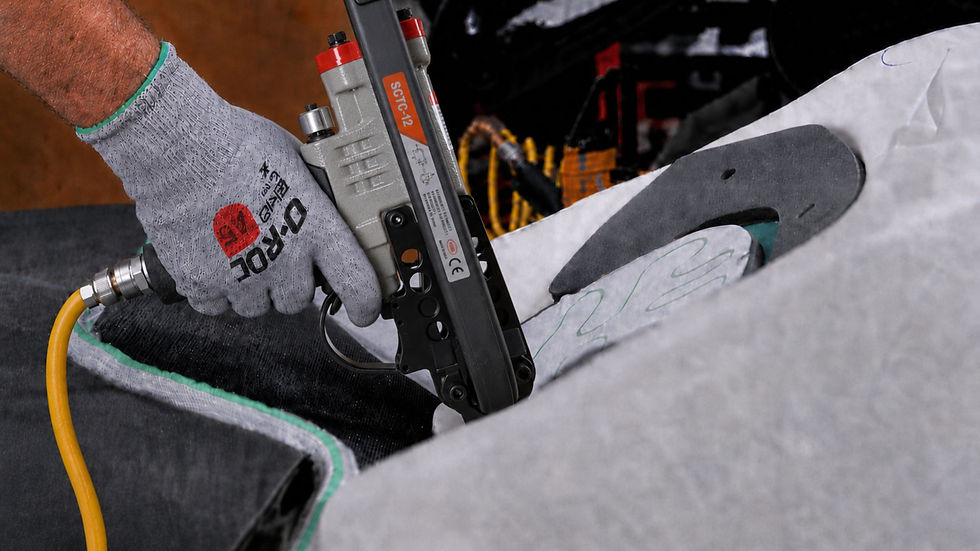
For workshop repair, pneumatic fastening can reduce hand fatigue and speed up repeated attachment points. For production environments, it helps maintain more consistent drive depth and fastening quality across multiple seats.
3. Material-Specific Pressure Control
Pressure control is one of the most important setup steps in automotive seat upholstery. Too much air pressure can cut through fabric, mark leather, crack plastic backing, or crush foam. Too little pressure can leave staples proud, weaken the hold, or create snag points under the cover.
Practical starting ranges:
Material / Substrate | Starting PSI Range |
Lightweight fabric | 55-70 PSI |
Foam-backed textile | 55-75 PSI |
Vinyl or leatherette | 60-75 PSI |
Genuine leather with backing | 60-80 PSI |
Plastic or composite trim panels | 70-90 PSI |
Dense backing board | 80-100 PSI |
These are starting ranges, not fixed rules. Always test on scrap material from the same seat cover, foam, backing board, or trim substrate before production. Reset and retest whenever the material, fastener length, staple crown, air supply, or tool changes.

4. Tool and Fastener Role Differentiation
For automotive seat work, the tool should be chosen based on material sensitivity, holding strength, access angle, and surface protection.
Fine-wire upholstery staplers are suitable for fabric, leatherette, foam-backed materials, and hidden upholstery edges. They reduce visible material damage and are useful where the fastener needs to hold without cutting through the surface.
Medium-crown staplers provide stronger holding power for backing boards, trim panels, and denser materials. They should be used carefully around brittle plastic or thin composite panels.
Hog ring or C-ring tools are often used where seat covers attach to listing wires, rods, or internal support points. They help maintain seat cover contour and tension.
Brad nailers and finish nailers are generally not the main tools for automotive seat upholstery. They may be useful for workshop fixtures or non-seat trim support components, but they should not be treated as the default fastening solution for seat upholstery or safety-related structures.
5. Protecting Seat Surface Quality
Automotive interiors are judged by surface finish. A fastening mistake may later appear as wrinkles, loose fabric, uneven tension, punctures, dents, or damaged stitching.
Before fastening, check:
Whether the fastener sits under a visible surface
Whether the material stretches under tension
Whether the foam compresses too easily
Whether the backing board can crack
Whether the staple leg length is too long
Whether the fastener could contact wiring or sensors
Whether the fastening point is near airbag or heating components

Important note: automotive seats may contain side airbags, seat heaters, ventilation channels, occupancy sensors, wiring harnesses, and structural safety components. Pneumatic fastening should not be used near these systems unless the repair or production workflow is approved for that seat design.
6. From Seat Covers to Finished Interior Results
The finished seat cover must look smooth, stay tight, and support daily use. Hidden fastening points help control the final shape of the seat, especially around bolsters, cushion edges, side panels, and backrest zones.

For leather and premium trim surfaces, the fastening process should protect stitching lines, avoid surface marks, and maintain even tension. For fabric and foam-backed materials, the process should prevent tearing, over-compression, and loose edges.
7. Production and Repair Workflow
A repeatable fastening workflow helps both automotive upholstery shops and seat assembly teams achieve more consistent results.
Recommended setup process:
Identify the seat material and backing substrate.
Select the fastening method: staple, hog ring, clip, retainer, or combined method.
Match staple gauge, crown width, and leg length to the material.
Start with a conservative PSI setting.
Test on scrap material from the same job.
Check for pull-through, surface marks, cracking, and fastener depth.
Record the approved setting.
Retest after any material, fastener, or tool change.

For production lines, documented setup standards help reduce rework. For repair shops, they help technicians repeat good results across different vehicle models and upholstery materials.
8. Quality Checks Before Final Seat Installation
Before the seat is installed or delivered, check both the visible surface and hidden fastening areas.
Quality checklist:
No visible punctures, dents, or pressure marks
No loose fabric or uneven tension
No proud staples or exposed fastener ends
No cracked plastic or crushed backing board
No interference with wiring, sensors, heaters, or airbag areas
Seat cover contour remains consistent
Stitching alignment and surface appearance remain clean
Fasteners are appropriate for the interior environment

For vehicles exposed to humidity, frequent cleaning, convertible use, or coastal conditions, corrosion-resistant fasteners may be considered. Stainless steel fasteners may be preferred in higher-moisture environments, while galvanized options may be acceptable in lower-risk interior locations depending on the application and testing requirements.
9. meitetools Support for Automotive Seat Fastening
meitetools pneumatic staplers and fastening tools can support automotive seat upholstery, interior trim attachment, seat repair, and production workflows when matched with the correct material, fastener, and pressure setup.
For automotive upholstery shops, repair teams, trim manufacturers, and seat assembly operations, the right pneumatic fastening solution can improve speed, reduce fatigue, protect surface quality, and support repeatable results.
The best fastening result comes from balancing four factors: tool selection, fastener compatibility, pressure control, and material protection. For automotive seat applications, these details determine whether the finished seat looks clean, holds tension, and performs reliably in daily use.


Comments